How to Create a GitHub App (and What to Put in the Webhook URL Field)
To create a GitHub App, you register it under Settings → Developer settings → GitHub Apps — and the registration form asks for one thing most people don't have yet: a Webhook URL. The field is required whenever the "Active" checkbox is selected, and it comes selected by default.
The fix takes about 30 seconds: open webhookbox.net, copy the webhook URL it mints for you instantly (no signup), and paste it into the form. Your app registers cleanly, every event GitHub sends is captured and inspectable, and when your real server is ready you forward or replay everything to it. This guide walks through the whole registration, field by field.
What is a GitHub App (and when you need one)
A GitHub App is GitHub's first-class way to build an integration. Unlike a personal access token (tied to an employee's account) or an OAuth App (which acts on behalf of whoever authorized it), a GitHub App has its own identity: it is installed on an organization or on specific repositories, gets fine-grained permissions (for example "read issues, write pull requests, nothing else"), authenticates with short-lived installation tokens, and — the part this guide cares about — can receive webhooks for the events it subscribes to.
That's why connecting a tool to a company's GitHub almost always means creating a GitHub App under the organization: CI bots, code-review assistants, issue triagers, deployment tools and internal dashboards all follow this model. GitHub's own docs recommend GitHub Apps over OAuth Apps for new integrations.
Step 1 — Get your webhook URL first (30 seconds, no signup)
- Open webhookbox.net. A unique webhook inbox is minted for you on the spot — no account, no credit card.
- You get two real endpoints: one for Development and one for Production, in the form
https://hooks.webhookbox.net/ep_…. - Copy the Production URL — that's what goes into the GitHub form in the next step.
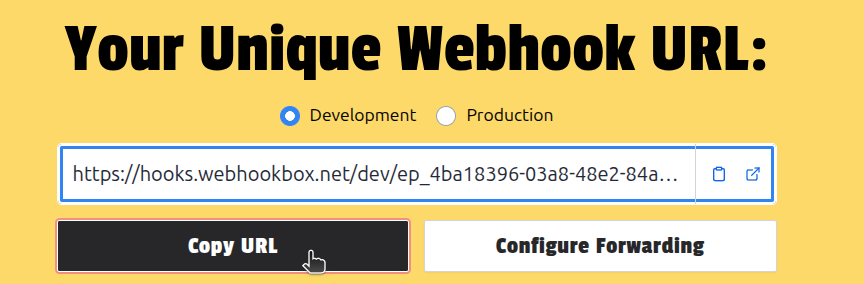
How long does it live? An anonymous inbox lasts 7 days (or 500 requests). Create a free account and the same URL becomes permanent — the claim keeps your full capture history, and nothing needs to change on the GitHub side. See plans and limits.
Step 2 — Create the GitHub App, field by field
Open the registration form
For a personal account: click your profile picture → Settings → Developer settings → GitHub Apps → New GitHub App.
For an organization (the usual case for company integrations): profile picture → Your organizations → Settings next to the org → Developer settings → GitHub Apps → New GitHub App. Registering under the org keeps ownership with the company instead of an individual employee — the full navigation is in GitHub's registration docs.
Name, description and Homepage URL
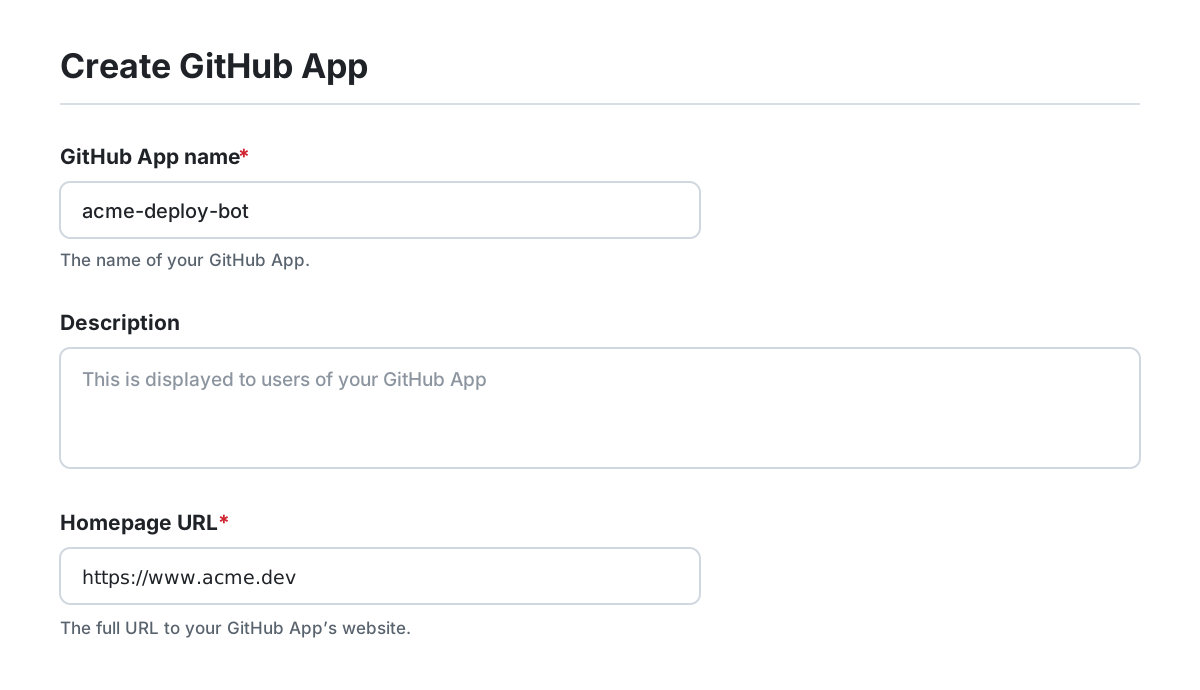
- GitHub App name — required, up to 34 characters, unique across GitHub. It is lowercased with spaces turned into dashes when displayed.
- Description — optional; shown to users when they install the app.
- Homepage URL — required, but low-stakes: your company site or even the repository URL of the project works.
Identifying and authorizing users (optional)
The Callback URL only matters if people will log in through your app (the OAuth user-authorization flow). For a server-to-server integration that reacts to events, leave it empty. Keep "Expire user authorization tokens" checked — it's GitHub's recommendation. The same goes for the Setup URL under "Post installation": skip it unless you need to redirect users somewhere after installing.
Webhook — Active, Webhook URL and Secret
This is the section that blocks most registrations. Keep Active checked — your integration exists to receive events — and paste the WebhookBox URL you copied in Step 1 into Webhook URL:
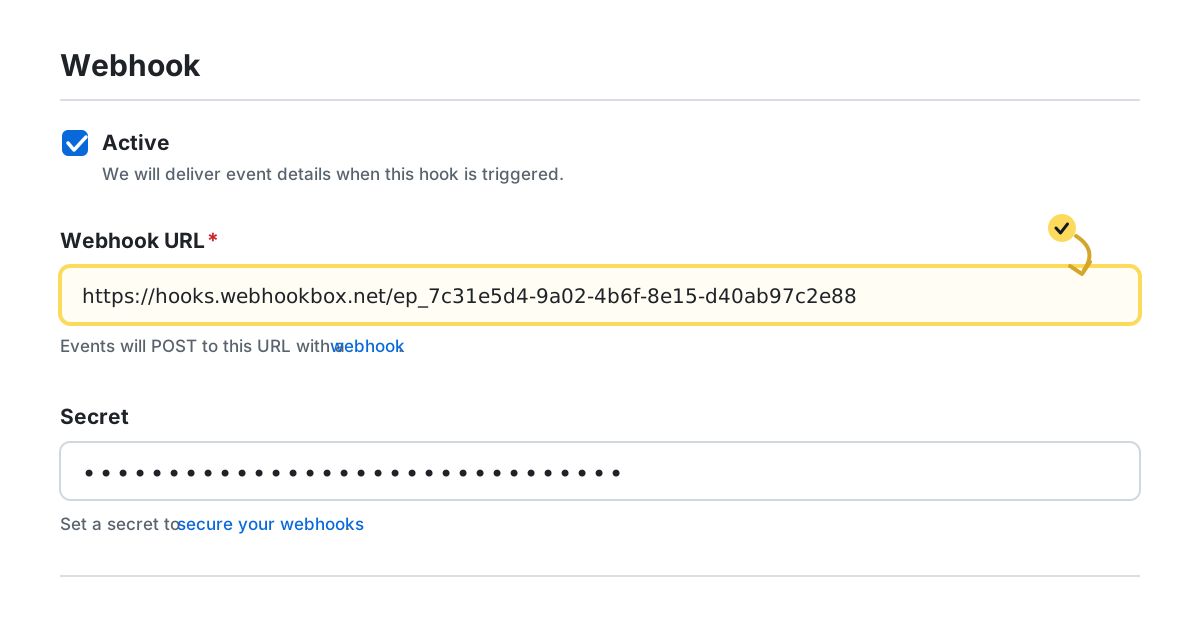
The Webhook secret is optional — it's an extra security layer, recommended once you head to production. GitHub uses it to sign every delivery (the X-Hub-Signature-256 header), which is how your server can verify a request really came from GitHub. If you want one, generate a high-entropy value:
openssl rand -hex 32If you set it, store it in your password manager — you'll configure the same value on the receiving side later. WebhookBox recognizes GitHub's signature scheme and can verify each delivery against your secret, so you can confirm the signatures are valid before you have written a single line of server code.
Permissions
Grant the least you need — permissions define what the app can touch, and installers see the list. Metadata: Read-only is included automatically. For example, an issue-triage bot needs Issues: Read & write and nothing else. You can add permissions later (existing installations are asked to approve the change).
Subscribe to events
The event list depends on the permissions you granted: pick the ones your integration cares about (for example Issues, Pull request, Push). With no extra permissions you'll still see Installation target, Meta and Security advisory available.
Where can this GitHub App be installed?
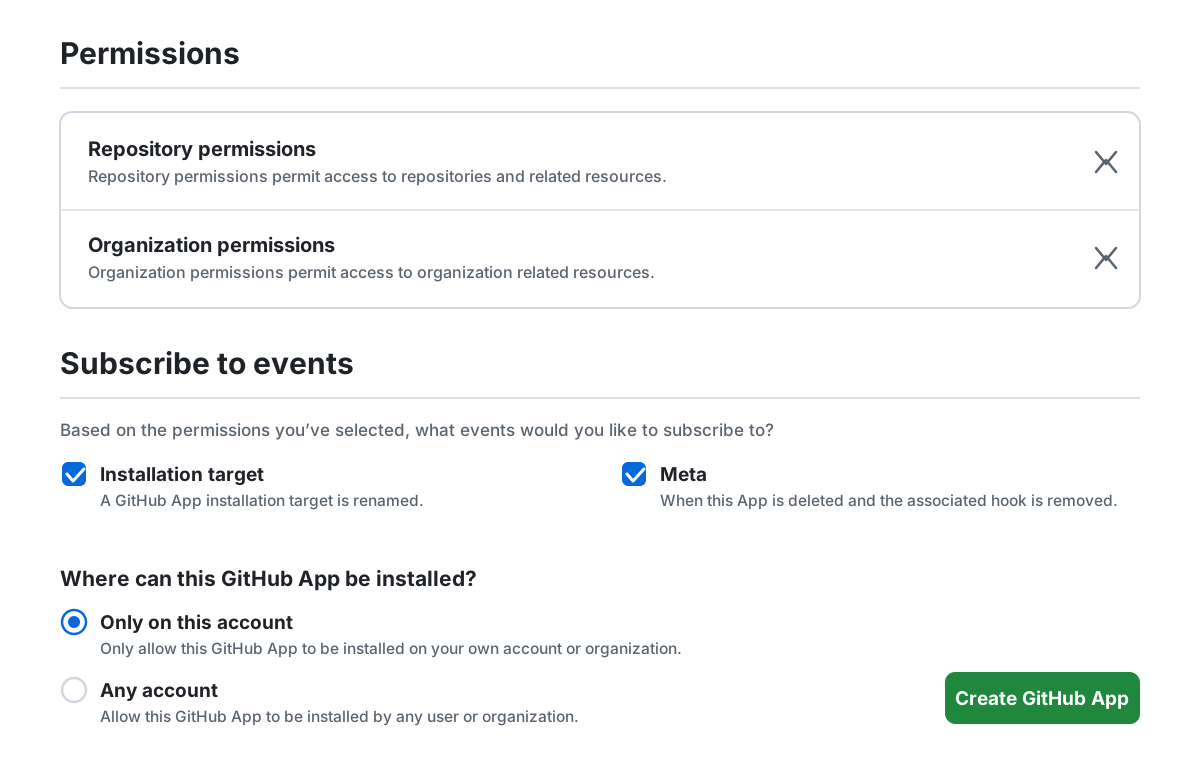
Only on this account (default) is right for internal company tooling. Choose Any account only if other users or orgs will install your app. Click Create GitHub App — done. On the next screen, note the App ID and generate a private key (a .pem file): you'll need both to authenticate API calls later.
Step 3 — Install the app and watch events arrive
A GitHub App does nothing until it is installed. From the app's settings page, open Install App in the sidebar, pick your organization, and choose All repositories or a selected list.
The moment you install it, GitHub sends your first delivery: an installation event (repository webhooks send a ping; GitHub Apps send installation instead). Switch to your WebhookBox tab — the request is already there:
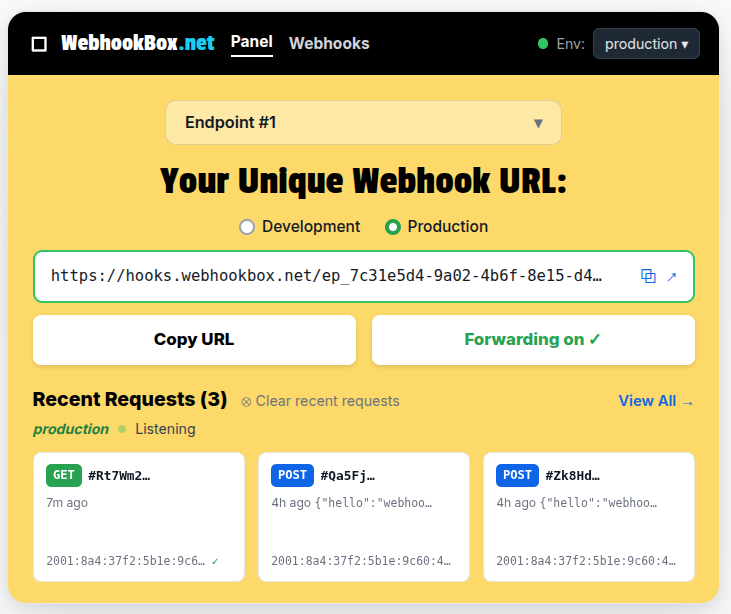
Open the request to inspect the headers that matter — X-GitHub-Event (the event type), X-GitHub-Delivery (a unique delivery id) and X-Hub-Signature-256 (the HMAC signature) — and the full JSON payload as a navigable tree. Now trigger a real event: open an issue or push a commit in an installed repository and watch it land. This is the fastest way to learn the exact payload shape you'll be coding against.
On the GitHub side, the app's Advanced tab lists every recent delivery with its response code — and a Redeliver button, handy once your real endpoint takes over.
When your real server is ready
You have two clean paths out of the temporary setup — and neither loses data:
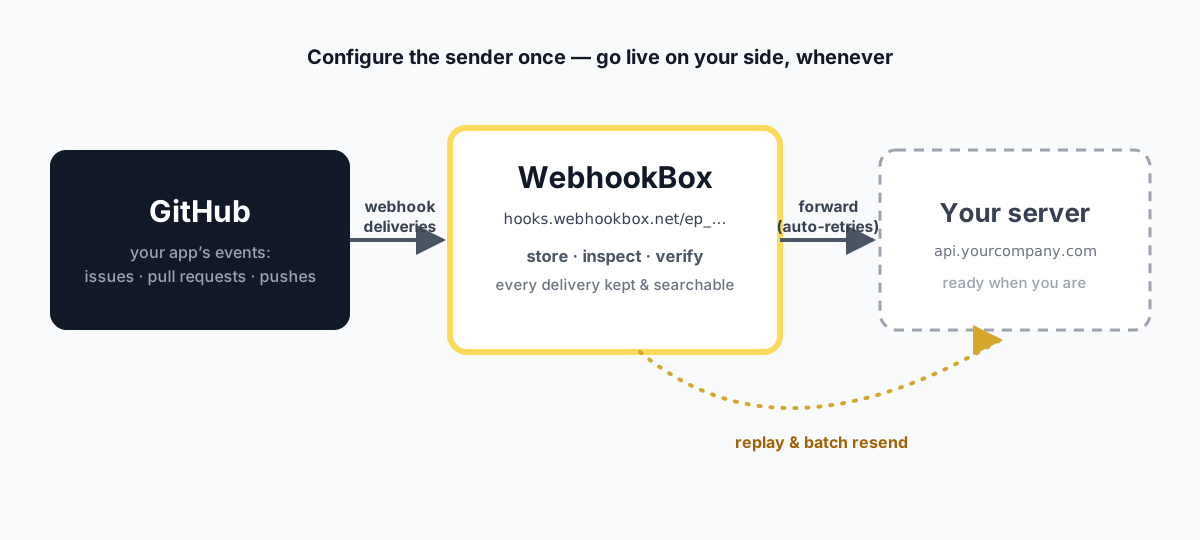
- Switch the URL. Edit the GitHub App and replace the Webhook URL with your production endpoint. Everything captured during development stays in WebhookBox, and you can batch-resend it to the new destination so your server processes the backlog too.
- Keep the inbox in front. Leave the GitHub App pointing at WebhookBox and turn on forwarding to your server (automatic retries with backoff, plus per-delivery visibility). You get a permanent record of every event, replay on demand — and you never touch the GitHub App's settings again. The sender is configured once, forever.
That second path is the quiet superpower of starting with a webhook inbox: the integration was receiving, storing and verifying events from minute one — before your server existed — and going live was a switch you flipped on your side, not GitHub's. We unpack that pattern — and why it's worth keeping in production — in how to receive webhooks instantly.
FAQ
Is the Webhook URL required when creating a GitHub App?
Yes, whenever the "Active" checkbox in the Webhook section is selected — and it is selected by default. If you uncheck it, the app registers without a URL but receives no events at all, which defeats the purpose of most integrations. The practical fix is pasting a capture URL (for example a free WebhookBox endpoint) and pointing it at your real server later.
Can I change the webhook URL after the GitHub App is created?
Yes. Open the app under Settings → Developer settings → GitHub Apps → Edit, change the Webhook URL and save. Note that past deliveries are not resent automatically: you can redeliver them one by one from the Advanced tab, or — if the old URL was a webhook inbox like WebhookBox — batch-resend everything it captured to the new destination.
What is the difference between a GitHub App and an OAuth App?
A GitHub App has its own identity, fine-grained per-repository permissions, built-in webhooks and short-lived installation tokens. An OAuth App acts as the user who authorized it, with broader scopes. GitHub recommends GitHub Apps for new integrations, especially for organizations.
How long does the free WebhookBox URL last?
Without an account, an inbox lives for 7 days or 500 requests, whichever comes first. Creating a free account claims the same URL permanently — nothing to reconfigure on the GitHub side — with 1 endpoint, 5,000 stored requests and 7-day retention on the Free plan; paid plans extend those limits.
Does WebhookBox verify GitHub webhook signatures?
Yes. GitHub signs every delivery with the X-Hub-Signature-256 header (HMAC of the payload using your webhook secret). WebhookBox detects GitHub deliveries, shows the signature headers, and can verify each delivery against the secret you configure.